
Download the modded Xoliul shader here. (comb map goes into tangent map slot and tick the anisotropy box) Originally created by Laurens Corijn ;& Robbert-Jan Brems. Modded by Mike Blackney.
Using Core's Paint Shop Pro picture tubes.
In order to control anisotropic direction (for a hair shader, the most classic example) we must control the direction. It can be simple if every plane of hair is mapped with the root at the 0 UV space and the tip at the 1 UV space, but sometimes a hair texture might have a lot more complexity, or we might want to add anisotropy to a solid volume such as a horse or cat, where the surface cannot be mapped in such a way. In these instances, the shader needs a "comb map" also sometimes called a flow map. It works similar to a normal map, in that it provides a vector direction for each pixel. The problem is that it is very difficult to bake or create this kind of map manually. Until now!
If you do not understand anisotropy or the concept of a comb map, please scroll down to the explanation.
When I was researching anisotropy, I was very frustrated to find no good information about controlling it's direction. My research indicated that until recently, anisotropy was the realm of film, where rendering times don't matter, and most hair is actually modeled geometry that can easily be mapped from 0-1 in UV space from root to tip. This meant that it wasn't necessary for most off-line film rendering to have per pixel control, and thus no tools I could find would aid in it's creation. I got to thinking that maybe I could find a program that would paint color based on direction. I spent several hours on google, and managed to finally figure out that paintshop pro allows functionality that would let me create this. It will sample from an image, based on a grid input, and choose from this grid based on angle. This ultimately ended up working after some experimentation.
First, in order to get correct vector direction colors, I created a cone, placed it over a plane, and did a normal map bake.
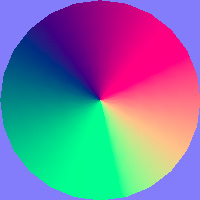
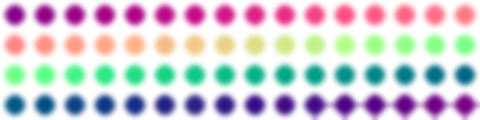
I wanted concrete steps, so I used photoshops "posterize" filter to give me 64 absolute steps.

I then created a grid, sixteen by four cells, which these sampled colors in each one. PNG here
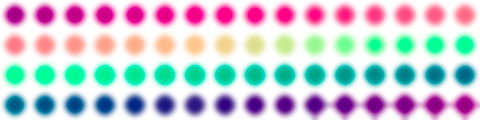
I also created one with 3 dots to do finer hairs, like this. PNG here
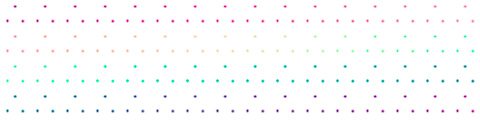
You can download these two picture tubes here: Big soft and Speckle. Here is a video of me using them, it explains much better. In order to use it, you simply open your diffuse map, and start painting over it in a new layer. Start at the "root" of the hair, and brush down along the hair in the direction it's traveling. Start with big brushes, and make new layers for smaller brushes, it helps to put the comb layers below on partial transparency so you can see the diffuse to help guide you. At the end, I recommend a little blurring to remove any stair stepping. This video was made with a 40 step brush, but the downloads are with a 64 step brush, much smoother and less stepping from direction changes.
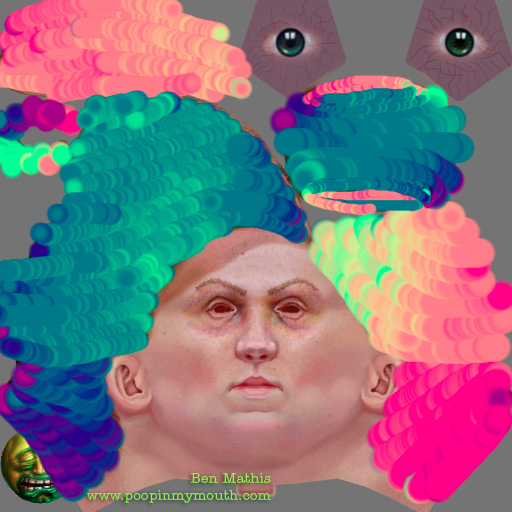
The steps to creation. Diffuse first
Paint rough direction with large soft brush
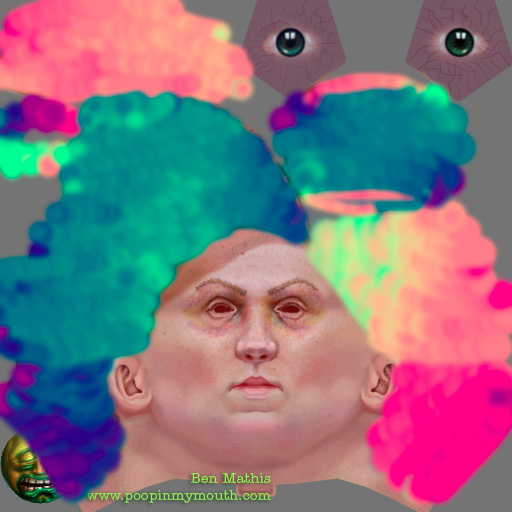
Blur to remove obvious stepping
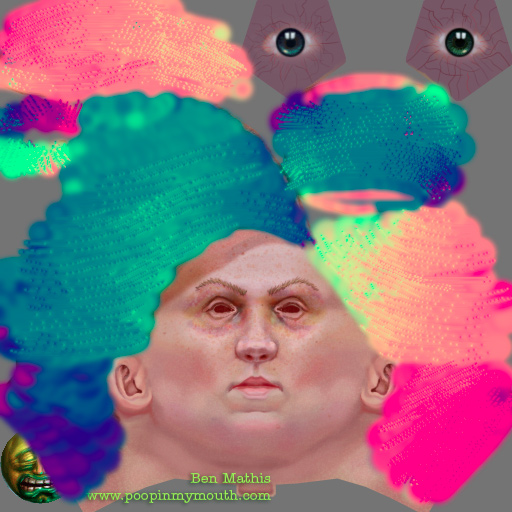
Paint in smaller details with speckle brush
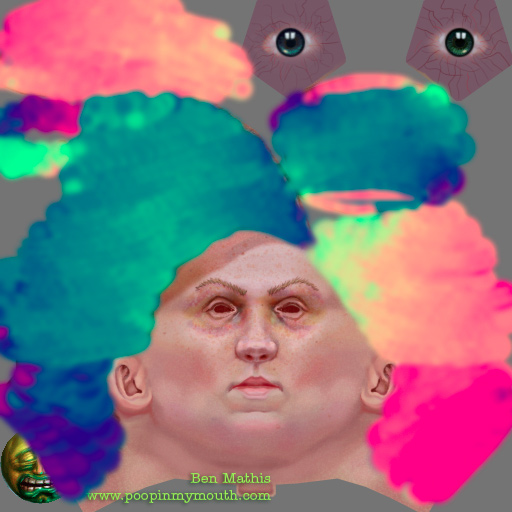
Blur again to remove stepping.
Black and white map used to control where anisotropy should be. Not needed if your hair is a separate piece of geometry.
An animated gif showing the buildup
A kind soul has altered the Xoliul shader to contain anisotropy and use comb maps created this way. I'm just waiting for the Xoliul shader creators permission to host or link to it so that all may use.
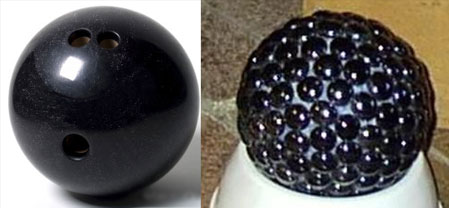
Here is an illustration. On the left is a bowling ball. You get one specular highlight from the fact it's just a giant smooth ball. On the right, you have a bowling ball covered in marbles. Each marble has it's own specular highlight, because they make the surface rougher. This is exactly the difference between a smooth and a rough surface. You could also think of the difference between a smooth mirror-ball, and a disco-ball. Human skin has millions of tiny drops of oil, acting like these glass marbles. Black asphalt has tiny grains of sand and rock that are at different angles. A rough surface is essentially a faceted surface, so there is more than one non-contingent area that faces in each direction.
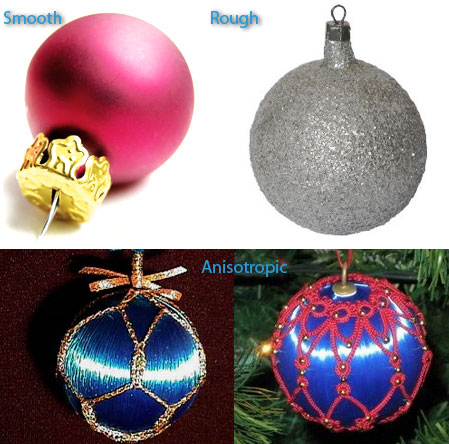
Some objects can have their roughness aligned in a certain direction. Think brushed aluminum, freshly-combed human hair, a Christmas ornament wrapped in thread, or a vinyl record. This roughness is referred to as anisotropy. It will affect the highlight in a way that runs along the rows of roughness. It's best to think of it like the human hairs. Thousands of tiny cylinders all roughly parallel to one another. Each hair has a normal specular like a cylinder, but when seen as a whole, you get a long, narrow highlight. If the exact same surface were perfectly smooth like a bowling ball, you'd get a specular hotspot the shape of the light source. It's the parallel roughness that causes anisotropy.
Example image: (notice how the smooth version is one continuous circle that fades out, the rough version is the same shape, but it's broken up into tiny chunks, the anisotropic turns it into a wide band that wraps around the sphere)
So now you know what anisotropy is, but why do we need to control it with a comb map? The easiest explanation is that we use two dimensional pictures of things to represent details still in games. When we make a horse, a werewolf, a cat, or any other furry object, we don't get a cylinder per strand of hair. We often paste or paint pixels that represent hair and read to our eyes visually as hair, but to the computer it's simply values.
Out of the box, anisotropic shaders simply give us a global direction across the surface. Do you want the anisotropy to flow from north to south? East to West? Simply change the value. Here is an animated gif showing a cylinder first with a blinn shader, then with anisotropy, and then I change the orientation value. Then I show you again on numerous cylinders, first with 0 as an orientation, then with 90 degrees, then finally to a blinn again. (red box is where the shader changes, green box is where I change the anisotropy angle)
But, what happens if our object has multiple direction changes on it's surface? Think of a typical video game asset, let's choose a character. We texture the armored chest plate to look like metal, and then the neck to look like soft flesh. It's still the same continuous chunk of polygons, with the same texture, but we use the diffuse (and probably also the specular and gloss map) to describe a surface change. This part is metal, this part is flesh. But we're just using a picture of it, it's not actually those things. Now extrapolate that to hairs and fur. We model a horse out of one continuous mesh, but his hair flows in one direction on his rump, and another down the leg. A global value would look wrong on one of these areas. If we rotate it so that the body looks right, now the legs look wrong, as does the front of the face.
To simply further, let's look at a braid. This is a photograph, a braid texture would never have such strong highlights painted in, but it shows clearly how the anisotropy flows in different directions based on the hair orientation. Imagine this is your diffuse texture.
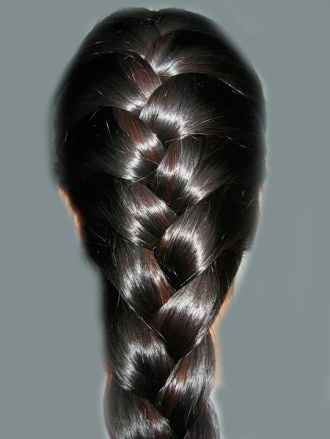
Now let's pretend this photo is a texture, and we have assigned the 3d model an anistropic shader with only a single global value. The green arrow represents the angle I chose. The highlights look great on the hair chunks going from upper left to lower right, but are completely wrong on the chunks going from upper right to lower left. If we rotated the direction to make it fit for them, the first chunks would break. In this example we have no comb map, simply a normal anisotropic shader with a global numerical input value in the form of an angle (0-360).

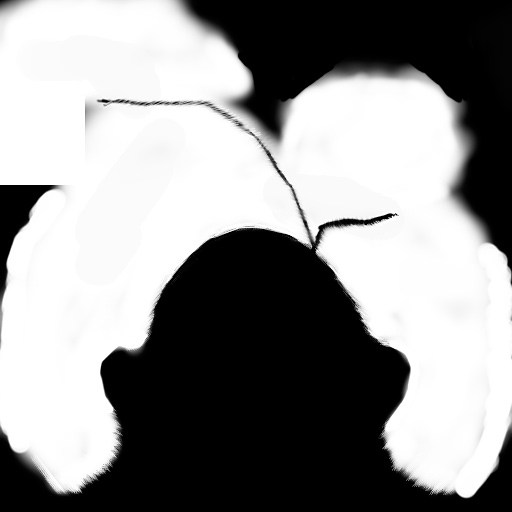
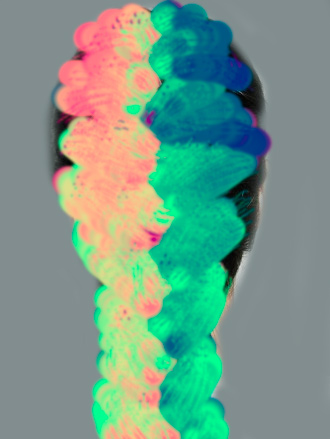
But with a comb map, we can use a different orientation value per-pixel! This will allow for the anisotropy to correctly follow the diffuse and normal map directions. In the same way a shader reads the value of a normal map pixel to determine what angle it should light the object, a shader that uses a comb map to control anisotropy will read the angle from the pixel in the comb map to determine anisotropy angle. This would be what your comb map would look like, the values correspond to the "direction" the hair is flowing. The shader can read this and correctly orient the anisotropic highlight.
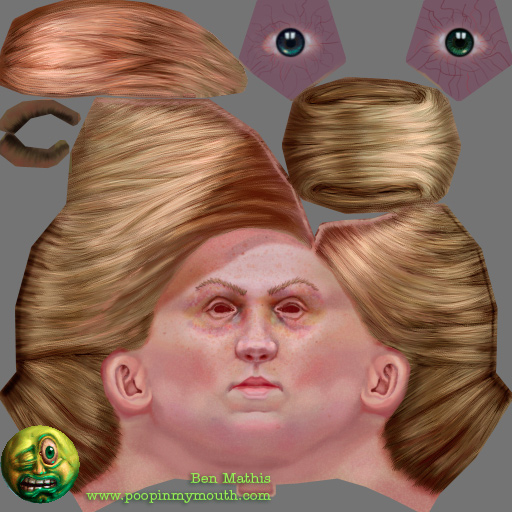
The Delilah head with a blinn specular vs. anisotropy that's been combed.
